Front room & map lamps
When replacing the bulb, put the front room & map lamps switch into the “OFF” position.
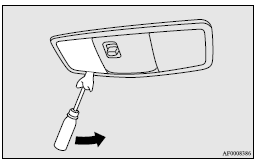
1. Insert a straight blade (or minus) screwdriver with a cloth over its tip into the notch of the lamp assembly. Gently pry to remove the lens.
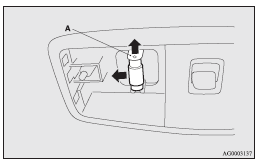
2. While holding down the tab (A), pull out the bulb.
3. To install the bulb, perform the removal steps in reverse.
![]() Note
Note
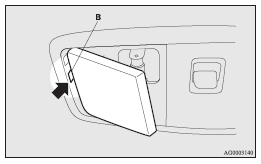
► When mounting the lens, align the tab (B) to the hole on the vehicle body.
See also:
Doors
Operation from outside the vehicle
1- Insert or remove the key 2- Lock 3- Unlock
Operation from inside the vehicle
1- Lock 2- Unlock
Pull the inside door handle toward you to open the door.
W ...
To listen to a CD
1. Insert disc with label facing up.
When a disc is inserted, the CD indicator (16) will come on and the CD player
will begin playing even if the radio is being used.
The CD player will also start ...
Licence plate lamps
1. Remove while pressing the lamp unit (A) to the left side.
2. Insert a minus screwdriver with the end covered with a cloth or other object
to press the hook (B) aside and remove the lens.
3. ...