To remove the key
For vehicles equipped with a M/T, when removing the key, push the key in at the “ACC” position and keep it depressed until it is turned to the “LOCK” position, and remove it.
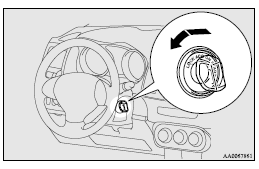
For vehicles with CVT or Twin Clutch SST, when removing the key, first set the selector lever (CVT) or gearshift lever (Twin Clutch SST) to the “P” (PARK) position, and then turn the key to the “LOCK” position and remove it.

![]() Caution
Caution
► Do not remove the ignition key from the ignition switch while driving. The
steering wheel will be locked, causing loss of control.
► If the engine is stopped while driving, the brake servomechanism will cease to
function and braking efficiency will deteriorate.
Also, the power steering system will not function and it will require greater manual
effort to operate the steering.
► Do not leave the key in the “ON” position for a long time when the engine is not
running, doing so will cause the battery to be discharged.
► Do not turn the key to the “START” position when the engine is running, doing
so could damage the starter motor.
See also:
Front turn-signal lamps
1. Remove the clips (A) and clips (B), then remove the duct (C) and the upper
cover (D).
2. Remove the entire socket and bulb assembly (E) by turning it anticlockwise.
: Front of the vehicle ...
Fuse load capacity
The fuse capacity and the names of electrical systems protected by the fuses
are indicated on the inside of the fuse lid (LHD vehicles), the inside of the glove
box (RHD vehicles) and inside of th ...
Wiper blades
Use a soft cloth and glass cleaner to remove grease, dead insects, etc., from
the wiper blades. Replace the wiper blades when they no longer wipe properly. (Refer
to page 9–18) ...