Position lamps (except for vehicles equipped with high intensity discharge headlamps)
1. For petrol-powered vehicles equipped with turbocharger, when replacing the bulb on the left side, remove the bolt (A) holding down the relay box and move the relay box towards the rear of the vehicle.
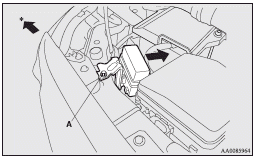
: Front of the vehicle
2. For petrol-powered vehicles equipped with turbocharger, when replacing the bulb on the right side, lift up the engine coolant reservoir (B).
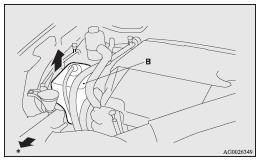
: Front of the vehicle
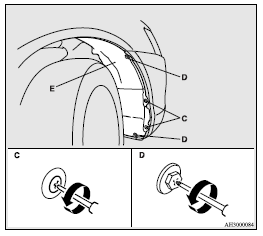
3. When replacing the bulb on the right side of the vehicle in case of diesel-powered vehicles, turn the steering wheel to the left to create enough work space. And then, remove the clips (C) and screws (D) to turn up the cover (E).
4. Turn the socket (F) anticlockwise to remove it.
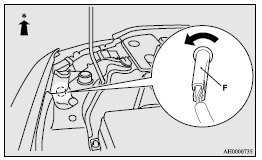
: Front of the vehicle
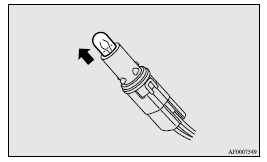
5. Pull the bulb out of the socket.
6. To install the bulb, perform the removal steps in reverse.
See also:
Styling
Some people suggest that a car's performance is the most important part of
any review, but that's not the case with the new Lancer. This is one
sharp-looking sedan. Rarely do I test a sub-$20,000 ...
Features
To come in at under $14,000, the base Lancer DE forgoes some important
equipment like air conditioning and antilock brakes; both are part of a $1,100
option package. The DE does come with power wi ...
Accessory socket
The accessory socket can be used while the ignition switch is in the “ON” or
“ACC” position.
Caution
► Be aware that using electronic equipment with the engine off may run the
bat ...