Interior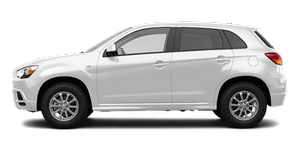
The Outlander Sport's interior is simple but not plain. There are enough chrome- and metal-looking accents to keep the interior from being boring.
The climate controls are in the form of easy-to-decipher knobs, and the stereo system is straightforward, which I appreciated even though it looks dated with its dot-matrix display. Between that and the Rockford Fosgate logo, I felt like I was back in 1988. Those were good times, but an update wouldn't hurt, either.
The Outlander Sport's Bluetooth hands-free phone system was a piece of cake to use. The instrument cluster had a more modern readout than the stereo, and I loved that it said, "See You" whenever I turned the car off. Hopefully, it didn't say "Wouldn't want to be you" after I got out and closed the door.
The five-passenger crossover only comes with fabric upholstery, which is usually tough for parents to maintain. Add to the fact that it's black and you know that every piece of lint, Goldfish cracker and other miscellaneous goo will be easy for the whole world to see. Fortunately, there was a cool-looking square pattern on the fabric to help camouflage the kid debris.
The front seats are comfortable and bolstered just enough that they made me feel snug in them. The backseat bench isn't bolstered, and there's a surprising amount of legroom in the second row.
See also:
Diesel particulate filter (DPF)
The diesel particulate filter (DPF) is a device that captures most of the particulate
matter (PM) in the exhaust emissions of the diesel engine. The DPF automatically
burns away trapped PM during ...
Steering wheel lock
[For vehicles equipped with keyless operation system]
For information on operations for vehicles equipped with the keyless operation
system, refer to “Keyless operation system: Steering wheel loc ...
To lock without using the key
Set the inside lock knob (1) to the locked position, and close the door (2).
Note
► The driver’s door cannot be locked using the inside lock knob while the driver’s
door is opened. ...