Starting the engine (Diesel-powered vehicles)
1. Insert the ignition key and fasten the seat belt.
2. Apply the parking brake.
3. Depress and hold the brake pedal.
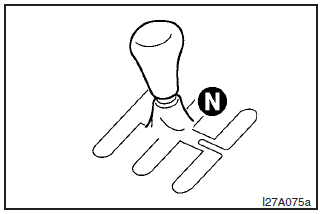
4. Place the gearshift lever in the “N” (Neutral)
position.
5. Fully depress the clutch pedal.
6. Turn the ignition key to the
“ON” position. The diesel preheat indication lamp will first illuminate in amber,
and then after a short time go out, indicating that preheating is completed.
7.
Turn the ignition key to the “START” position without depressing the accelerator
pedal, and release it when the engine starts.
NOTE
(1) If the engine is cold, the diesel preheat indication lamp is on for a
longer time.
(2) When the engine has not been started within about 5 seconds after
the diesel preheat indication lamp will go out, return the ignition key to the “LOCK”
position. Then, turn the key to the “ON” position to preheat the engine again.
(3) When the engine is warm, the diesel preheat indication lamp does not come on,
even if the ignition key is placed in the “ON” position.
Start the engine by turning
the ignition key right to the “START” position.
See also:
Front passenger’s airbag OFF indication lamp
The front passenger’s airbag OFF indication lamp is located in the instrument
panel.
The indicator normally illuminates when the ignition switch is turned to the
“ON” position or the oper ...
Installation of accessories
We recommend you to consult a MITSUBISHI MOTORS Authorized Service Point.
• The installation of accessories, optional parts, etc., should only be carried
out within the limits prescribed by law i ...
Installing a child restraint system to a 3-point type seat belt (with emergency
locking mechanism)
Installation:
1. Fasten the seat belt to secure the child restraint system. Make sure you hear
a “click” when you insert the latch plate in the buckle.
2. Remove all slack by using the locki ...