Front fog lamps (Type 2)
1. Remove the screw (A).
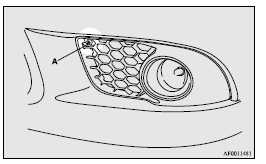
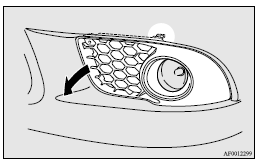
2. Pull the cover out in the direction of the arrow shown in the illustration.
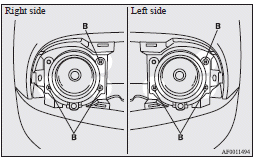
3. Remove the screws (B) and pull the entire lamp unit out.
![]() Note
Note
► When unfastening the screws, be careful not to mistakenly move the beam position adjustment screw (C).
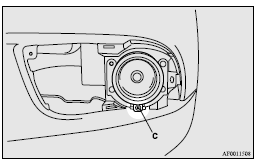
4. Push the connector (D) to disconnect and remove the fog lamp.
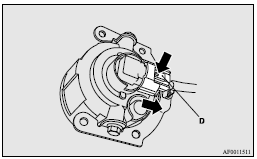
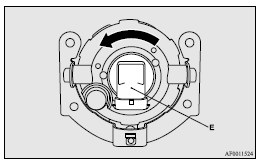
5. Remove the bulb assembly (E) by turning it anticlockwise.
![]() Caution
Caution
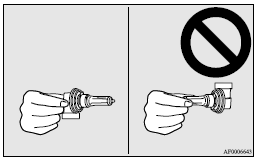
► Handle halogen lamp bulbs with care.
The gas inside halogen lamp bulbs is highly pressurized, so dropping, knocking,
or scratching a halogen lamp bulb can cause it to shatter.
► Never hold the halogen lamp bulb with a bare hand, dirty glove, etc.
The oil from your hand could cause the bulb to break the next time the fog lamps
are operated.
If the glass surface is dirty, it must be cleaned with alcohol, paint thinner, etc.,
and refit it after drying it thoroughly.
6. To install the bulb, perform the removal steps in reverse.
![]() Note
Note
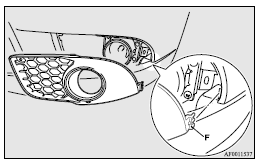
► When mounting the cover, align the hook (F) on the cover with the hole in the body.
See also:
Cancelling the alarm
It is possible to halt the activation of an alarm using the following methods:
• Pressing the LOCK or UNLOCK switch on the remote control switch.
(After pressing the LOCK switch, the vehicle will ...
To install
Align the tyre valve with the valve opening provided on the wheel cover.
Then tap around the outer edge of the wheel cover with your hand to secure it
in place.
NOTE
Full wheel covers have a sy ...
Selector lever positions (Main gate)
“P” PARK
This position locks the transmission to prevent the vehicle from moving. The
engine can be started in this position.
“R” REVERSE
This position is to back up.
Caution
► N ...