Front room & map lamps
When replacing the bulb, put the front room & map lamps switch into the “OFF” position.
1. Insert a straight blade (or minus) screwdriver with a cloth over its tip into the notch of the lamp assembly. Gently pry to remove the lens.
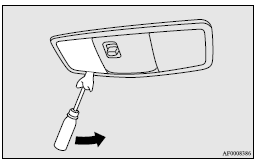
2. While holding down the tab (A), pull out the bulb.
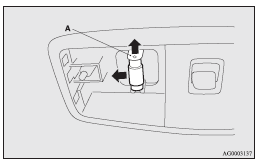
3. To install the bulb, perform the removal steps in reverse.
![]() Note
Note
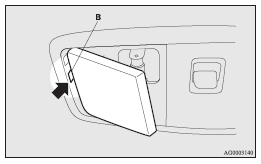
► When mounting the lens, align the tab (B) to the hole on the vehicle body.
See also:
Front passenger seat belt warning lamp
The front passenger seat belt warning lamp is located on the instrument panel.
The lamp comes on when a person sits on the front passenger seat but does not
fasten the seat belt. It goes off when ...
Error codes
Vehicles with LW/MW/FM digital tuning radio with CD player/CD changer
If an error code (1) appears in the display, take action in accordance with the
table below.
...
Air purifier
An air filter has been incorporated into the air conditioning so that pollen
and dust are cleaned from the air.
Replace the air filter periodically as its ability to clean the air will be reduced
...