Stop and tail lamps and rear turn-signal lamps
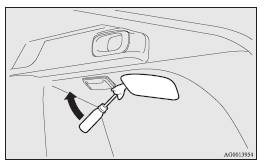
1. Insert a straight blade (or minus) screwdriver with the end covered with a cloth or other object at the edge of the cover and pry gently to remove the cover.
2. Remove the socket and bulb assemblies by turning them anticlockwise.
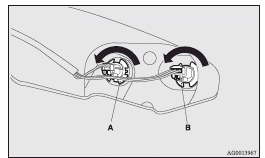
A- Rear turn-signal lamp
B- Stop and tail lamp
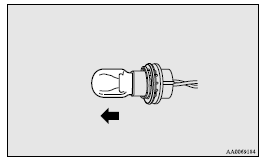
3. Remove the bulb by pulling it out.
4. To install the bulb, perform the removal steps in reverse.
![]() Note
Note
► When installing the cover, make sure the arrow on the cover is pointing in the direction of the front of the vehicle.
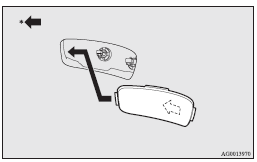
: Front of the vehicle
See also:
Headlamps (high-beam, except for vehicles with high intensity discharge headlamps)
1. When replacing the bulb on the right side of the vehicle, remove the bolt
(A) holding down the washer tank spout and move the spout towards the rear of the
vehicle.
: Front of the vehicle
2 ...
Obstacle detection areas
The detection areas of the corner and back sensors are limited to those shown
in the illustration. Moreover, the sensors are unable to detect low or thin objects
or objects near the rear bumper. T ...
Procedure for replacing the remote control switch battery
1. Before replacing the battery, remove static electricity from your body by
touching a metal grounded object.
2. With the MITSUBISHI mark facing you, insert the cloth-covered tip of a straight
b ...