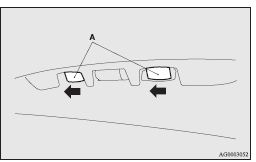
Licence plate lamps
1. Remove while pressing the lamp unit (A) to the left side.
2. Insert a minus screwdriver with the end covered with a cloth or other object to press the hook (B) aside and remove the lens.
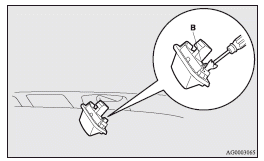
3. Remove the bulb by pulling it out.

4. To install the bulb, perform the removal steps in reverse.
![]() Note
Note
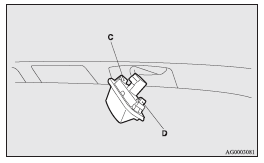
► When installing the lamp, insert tab (C) first then align and insert tab (D).
See also:
Traffic information
The radio will automatically tune in to traffic information broadcasts while
receiving UKW broadcasts, playing cassettes.
To select this function, follow the instructions below.
1. Press the TP bu ...
Seat belt inspection
• Check the belts for cuts, worn or frayed webbing and for cracked or deformed
metallic parts. Replace the belt assembly if it is defective.
• A dirty belt should be cleaned with neutral deterg ...
Lamps (headlamps, fog lamp, etc.) auto- cutout function
► If, while the lamp switch is in the “ ” position, the ignition switch is turned
to the “LOCK” position or “ACC” position, or the key is removed from the ignition
switch, the la ...