To listen to tracks from a device connected via Bluetooth
1. Press the PWR button (2) to turn on the audio system. The system turns on in the last mode used.
2. Press the CD button (1) several times to switch to the B (Bluetooth®) mode. The input mode changes as follows every time the CD button is pressed.
CD mode → USB (iPod) mode → Bluetooth ® mode
![]() Note
Note
► For vehicles equipped with audio/video input RCA terminals, pressing and holding the CD button for 2 seconds or more switches the system to the AUX mode.
3. Connect your Bluetooth® device. Refer to “Connecting the Bluetooth® 2.0 interface and Bluetooth® device”.
4. Playback starts automatically.
![]() Note
Note
► Depending on the connected device, the playback may not start automatically.
In this case, operate the connected device to start the playback.
To stop the playback (if supported by the device)
To stop the playback, press the DISC DOWN button (7).
To restart the playback, press the DISC UP button (8).
To pause the playback (if supported by the device)
To pause the playback, press the DISC DOWN button (7).
To restart the playback, press the DISC UP button (8).
To select a track (if supported by the device)
Press the TRACK button (10) to select the desired track number.
Press  : The track number increases
by one.
Press  : The track number decreases
by one.
Press  for a long period (approx.
2 seconds or more) : The track number increases continuously while the button is
pressed.
Press  for a long period (approx.
2 seconds or more) : The track number decreases continuously while the button is
pressed.
If the  side of the button is pressed
once while a track is playing, playback returns to the start of that track.
![]() Note
Note
► Every time the track selection button is pressed, the track number in the display changes.
To play the same track repeatedly (if supported by the device)
Press the RPT button (5) during playback to show “RPT” in the display.
To exit this mode, press the button again.
To play tracks in random order (if supported by the device)
Press the RDM button (6) to show “RDM” in the display.
The system randomly selects and plays tracks from all tracks in the Bluetooth® device.
To exit this mode, press the button again.
To find the start of each track for playback (if supported by the device)
Press the SCAN button (9). “SCAN” is shown in the display and all tracks in the Bluetooth® device are played for several seconds from the beginning.
To exit this mode, press the button again.
To switch the display (if supported by the device)
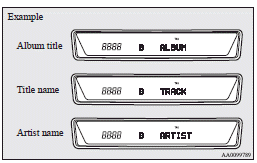
The system can display tag information.
1. Press and hold the DISP button (4) until you hear a beep to show “TAG” in the display.
2. The display changes as follows every time the DISP button (4) is pressed briefly: Album title → Title name → Artist name → Genre → Normal display

![]() Note
Note
► Press and hold the DISP button (4) again until you hear a beep, and the tag
information disappears.
► Up to 10 characters are shown in the display at once. If the title is cut off
in the middle, press the PAGE button (3). The next characters are displayed every
time this button is pressed.
► If no title is stored, “NO TITLE” is shown in the display.
► Characters that cannot be displayed are substituted by “•”.
See also:
Information screen display
Brake warning display
This warning is displayed if you drive with the parking brake still applied.
The warning lamp in the instrument cluster only illuminates when the parking brake
is applied. ...
Audio system
Type 1- LW/MW/FM digital turning radio with CD player
Type 2- LW/MW/FM digital turning radio with CD changer
For information on operations of the audio system for vehicles equipped with
MITSUBIS ...
Headlamp levelling switch
The angle of the headlamp beam varies depending upon the load carried by the
vehicle.
The headlamp levelling switch can be used to adjust the headlamp illumination
distance (when the lower beam ...
